4/03/2014

When tech fails

We all know that effective teaching and training require the ability to tap dance, so to speak. Since we all know that our sessions don't always go as planned, we’re prepared to work around problems that are bound to come up against. Here is a list of some of my favorite tools for those awkward moments.


Online solutions:
Issue   You cannot physically get to the meeting- Solution  Google Hangouts, Skype.
Since most professionals already use video conferencing tools, these services can keep you connected no matter where you are. I prefer Google Hangouts, since you can work on meeting notes together simultaneously while you meet.  


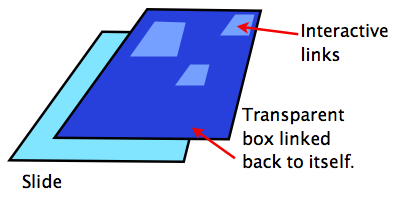
Issue   The projector bulb burns out- Solution   Screen leap.
Screen leap is a free online tool that allows you to project your computer screen onto a web page. Give your participants a simple link and they can watch your presentation from their own screens. It works on smartphones, too.


Issue   MS Office fails or is unavailable- Solution  Google apps, Zoho or Office.live.com.
These all have great word processors. Office Live will allow you to edit the documents properly and Google will convert your documents (albeit with severe formatting issues).


Issue   You forget an important file- Solution  Chrome Remote Desktop or Screenleap.  
Use one of the many Remote Desktop Platforms available to connect to your computer from afar.


Issue   Laptop failure- Solution  Chrome + Google suites.
This can save you as long as you maintain your important files in Google Drive and use online tools. As long as you sign into Chrome, you'll be able to bring up any tabs you had open on any other device. If your laptop dies while using Chrome, you can grab any other device and seamlessly continue where you left off.


Hardware solutions:
Issue   No Wireless - Solution  Simple wireless access point (WAP) and an ethernet cord.
For around 40 bucks total, this is a great way to get around those uncomfortable connection issues. As long as you can plug your ethernet cord into an active port, you’ll be fine. These are also great for hotel stays. Its usually free to use their wired internet, so you can plug in your WAP and create some free wi-fi.


Issue   No Speakers - Solution  Cassette tape adaptor.
Since most schools and many venues have large stereos or other speaker systems that still have working tape decks, its a good 10 dollar investment.


No-tech-at-all:
Issue   You completely lose access to technology.  Solution Paper, manipulatives and you.
I like to keep a few low tech solutions on hand just in case. I have a print out of my presentation for my own reference and a stack of one page handouts for my audience. For K-12 audiences, I’ve always had some hands on materials as well. Finally, I always make sure that I’ve gotten to know my audience ahead of time. With a little preparation, I can be engaging and informative without my tools. My presentation may not be as compelling, but I won’t leave the group high and dry.


4/01/2014

Make images interactive, free

There are an astounding number of places for students to go to get information they want. However, while the online universe can be a rich source of information, the educational potential of the internet is not in what can be consumed. The greatest power of online learning lies in what students can create.

One of the most useful free tools for useful, creative student projects is Thinglink. The idea is simple. Upload a picture, then make it interactive. See the example below.


The site designers had students in mind when they created it. You have the option of creating student groups and registering your students so that they don't have to. Once you have a log in set up for your students, they can go in and start annotating images as a way of explaining what they know about a given subject.

This tool has an amazing number of uses. Here are a few ideas:

  • K-12
    • Elementary- Students can label the pictures they take themselves. 
    • Middle- After completing a poster, students photograph it. Then they add tags explaining what it all means. 
    • High- Students create online reports for history, literature or science. They include interactive pictures. 
  • Professional development- Upload images of items your team needs to learn about. Add relevant information in the form of text, video or links to other pages. 

3/24/2014

Chromebook remote support

Once you start using Chromebooks in your Google Apps district, you'll start having people call you about issues. Your clients are out there and you are, well, somewhere else. You'll want to find some way of providing support for your users from a distance.

A temporary fix would be to have a couple of spare Chromebooks on hand. It takes under a minute for a student to grab another computer, start it up and log in. Whatever issue that other device was having is inconsequential as long as there is a spare on hand.

Of course spares aren't always available. One option is to use Google Hangouts which have a remote desktop feature that would allow you to reach across the distance and offer a helping hand. Of course, if you're giving students access to Google Hangouts, you'll be opening up an entirely new set of issues surrounding privacy and student safety. Its a tough call.  (Please don't confuse this with the Chrome Remote Desktop App.  That won't work with Chromebooks. Ironic, I know.)

There is always the option of using a third party remote desktop application like AccessToGo. Depending on your firewall's settings, the particular brand of Chromebook you've procured and your bandwidth this may or may not work for you.

The take away message is this: Don't count on the kind of simple and dependable remote support you've seen from Apple and Microsoft. Chromebooks are going to be a different animal altogether.


3/22/2014

Edit video on Chromebooks with WeVideo

Image of LaptopChromebooks are becoming a popular choice for schools around the US. Some teachers, though have expressed concern over what seems to be limited functionality. After all, if you can only produce content online, how are teachers supposed to do things like video creation?

WeVideo is the best tool I've found to give kids the tools to create, store and share video projects. This is primarily because it's free and it publishes videos directly to Google Drive. Note the use of the word "publish" instead of "save". Here is how it works: You create videos on their servers and are then given the option to publicly publish your video to the internet. In the free version, all videos are public by default. Once you publish the video to your Google Drive account however, making it private is simple. Just adjust the Sharing settings as you would with any other file. Keep in mind that if you have any privacy concerns, you'll have to be careful to adjust the sharing settings to every video you produce.

This option to save to Google Drive is important. First, it gives you immediate control over who may see your students' videos. For example, share the videos with parents, but prevent anyone else for seeing them. You'll also have a simple way of managing all those video files that come in. Put them into folders and organize them in a way that makes sense for you. The Google Drive app provides even more power. With it, those videos can be streamed (without being saved) to mobile devices. If you have the app yourself, you'll be able to take video with a smartphone and simply upload them to your Drive account. From there, you'll be able to edit them with WeVideo.

There are other video editors out there that are both free and produce a decent final video. Thus far, all of them have fatal flaws. Consider Youtube editor. The final result is in Youtube's proprietary format which means you have to use a third party application to download the video. Possibly more problematic is that Youtube is blocked in many school districts, so this wouldn't even be an option. Other video editors store your finished product on their own servers which may be fine. However, they just might reserve the right to use your video as part of their promotional material. "Free" accounts often come with some strings attached. So give this a try and let me know what you think.

6/09/2013

Use Prezi as a memory tool

If you haven’t tried working with Prezi yet, you’re missing out on an amazing product. What makes it so useful is the break from that forced march from beginning to end you get with other presentation tools like Power Point. Prezi allows you to zoom in and out of a virtual canvas, revealing text and other objects in crisp detail as you move closer or further out.


This zooming feature makes it perfect for a memory technique known as the memory palace. Here is the technique in its most simple form. Think of a place you know well like the home you grew up in. In each room, you create a vivid image representing the idea or fact that you want to recall. To remember it later, just mentally move through the rooms until you find what you need.

You can create as many memory palaces as you need. Prezi can really help in this because you can create an online version of your palace and use it as a visual aid while you memorize the material.

To do so, get a picture of a house. Make sure you use something that is licensed for reuse and modification. I like to go to Google Advanced Search and filter my search by license in order to make sure I’m not breaking any laws or ticking someone off. Next, create a blank Prezi. Now, drag and drop your (copyright friendly) image onto the Prezi. It should upload automatically. Once you have the image, simple add text describing the facts you want to recall.

Here is a sample Prezi I made as an example.


5/05/2013

Interactive tutorials with Google

Google presentations are great for a lot of reasons. Unfortunately, they are designed to go from one slide to the next in a simple, linear fashion. There’s a way to make them interactive. This post tells you how to do just that.


Short instructions:
1) Create a presentation.
2) Completely cover each slide with a transparent box.
3) Link that box to the same slide on which it was placed.
4) Add small transparent boxes over the portions that will make your "buttons" interactive.


Long instructions:


Create your slides
First create the entire tutorial minus the interaction. This includes any interactive buttons or clickable objects. Also, make sure you add any animations or slide transitions before moving on to step two. I'll explain why latter. I suggest making the tutorial in something like Powerpoint first, then copying it over to Google Docs. Powerpoint is far easier to work with. You’ll be better able to concentrate on architecture of the tutorial and be able to troubleshoot with less hassle. Google Docs will convert Powerpoints into a Google presentation, so there really isn’t much more work creating the tutorial in a separate program.


Once the tutorial has been created, uploaded and converted, it’s time to add the magic. First, we have to remove a feature that Google built into presentations. Normally, when you click on a slide it will automatically move to the next slide. You can stop that from happening by covering the entire slide with a transparent box.

Cover each slide
Add the box by clicking on “Insert”, then “Shapes”, then choose the square. You'll get a pair of cross hairs that you can use to draw whatever size square you choose. Start drawing just outside the slide, then click and drag to create a shape large enough to extend beyond the borders of the slide. Next, change the fill to transparent. Leave the line. This makes the box easy to for you see and since the box is outside the boundries of the actual slide, no one else will notice them. Now, click on that box, then click on the link button. One of your options will be to link to a specific slide. Choose the slide you are currently on. That way, when someone clicks anywhere on the slide, they'll stay on that slide and won't be able to move forward. You'll be giving them a way to move around in a moment. For now, you just need to prevent them from pushing forward every time they click on a slide.

Add invisible, linked squares
Finally,you’ll need to add the interactivity. Remember that you've already created the tutorial. All you're doing at this point is making your buttons and other clickable objects work. Once again, you'll need to create a transparent box and link it to a slide. This time, however you'll be linking to a slide
further along in your presentation.

In my example presentation, you'll see a "Next" button. I've covered that button with a transparent box that is hyperlinked to the next slide. When someone tries to click "Next", they'll actually click on my transparent box and be sent to the next slide in the tutorial.

Copy and paste is your friend here. For buttons like Next, Previous, Home and Exit, the transparent boxes will all be the same size and placed in same area on each slide. Once you have the boxes created for one slide, select all of the blocks (ctrl + click) then copy them all. Now all you have to do is go down from slide to slide hitting ctrl +v, pasting those boxes into position.

Publish or share
Don't forget that when you're all done, you need to change the privacy settings in your presentation to allow others to see what you've wrought. Below, I have an example of an very short interactive tutorial. It will give you an idea of what you can create.


4/19/2013

Embed a video from Google Docs

In our school system, youtube is blocked, so I wouldn't be able to upload any class videos and share them with my students.
Fortunately, I can embed videos strait from Google Drive. Instead of explaining how it's done, I thought it would be more appropriate to put a quick video together showing you how it's done. I chose not to add sound, but you certainly could.


I would appreciate comments and suggestions on how this could work for a flipped classroom.

4/10/2013

Awesome Note as a Classroom Tool


Source: http://sebastian.laxell.fi/files/awesome_note-300x300.jpg


Last time, I wrote about how great Awesome Note (aNote) is. Many of you loved it and I’m grateful to everyone who took the time to read that post. I left something out of it, though. This blog is dedicated to technological learning tools, and I never said a word about how to use aNote to either learn or teach. Let me correct that oversight now.

Teaching

  • Grading bulky projects like the vinegar/ baking soda volcano- Take a snapshot of the project you need to grade. After syncing with Google, go online and grade the project. This way, you don’t have to stay after to grade nor do you have to worry about lugging the projects home.  
  • Opportunistic slides- Have you ever seen something that you would love to show to your students? Snap a picture and add it to your notes. After syncing with Google, you’ll be able to create a nice, classroom friendly visual aide.
  • Lesson Planning- If you teach more than one group of kids, you’re bound to ask this classic question: “Did I tell you all this or did I just tell it to the other students?” A lesson checklist gets around this conundrum. Typing the list in Docs ahead of time makes this a breeze.  
  • Share your notes- You can adjust the privacy settings in Google Docs. That means that you can make one or all of your aNote folders viewable by whomever you want. This way, you can easily add class notes to a shared folder by doing nothing more than typing a note and syncing.


Learning
Note: Evernote is much better for archiving information, since it recognizes and can search any words on any picture you upload. The problem is that it costs money to upload a large number of snapshots to Evernote at one time. If you want to upload more, be prepared to pay.

  • Making notes about what you read- Snap a picture of the book or worksheet and make some notes about that section.
  • Photograph the board, overheads- Photograph the teacher’s board while she’s lecturing. Later, you can go into Docs to add some notes.
  • Pics of handouts- Snap pictures of handouts or sections of the handouts for future reference.
  • Create reference cards- Create some simple notes in Google Docs and sync them to aNote on your phone or tablet. That way, you’ll always have them handy.
  • Share folders, share notes- I mentioned this in the section on teaching. You can share Google Docs folders. That means the folders you’ve synced with aNote can also be shared with whomever you like.
  • Online Study Groups- Google hangouts allows you to work collaboratively on a Google Doc with the people in the hangout. You could start a hangout with classmates and pull up notes that you’ve taken in class.

One more thing. Using aNote to collect all this data could take up gigabytes of valuable space on your device. It’s easy to transfer notes if you sync with Docs. Just move the notes out of the folder called Awesome Notes in your Google Docs account. It doesn’t matter where you put them. Maybe you could make a folder called “Old Notes”. Once those files are out of the Awesome Note folder, the notes will be erased from you device during your next sync and safely stored online.

3/18/2013

Awesome Note +Google Drive


Source: http://sebastian.laxell.fi/files/awesome_note-300x300.jpg


Many of us organize our entire existence around our smartphones. I’m no exception. I depend on that little iPhone for my work and personal life. The phone, though is only as good as the apps I use. Recently, I’ve started using Awesome Note and I have to say it lives up to it’s name.

This is a note-taking, to-do and calendar app all wrapped into one. While it doesn’t do everything I want, Awesome Note is probably the best overall productivity app I’ve found. As a calendar, it can read/write your iPhone’s calendar and Reminders. The to-do function is alright. As you’d expect, you can add a due date, tell it to repeat and mark the status as in progress, pending or waiting. You can also change the relative importance of a task by marking it with 0 to 5 stars. Not fantastic but not bad, either.

As befits the app’s name, it creates fantastic notes that can be modified in dozens of ways. You can add checkboxes, dates and pictures. You can choose from plenty of backgrounds and fonts as well. Add a title and tag to each note and they become easily searchable.

The notes stay well organized in folders which can be be assigned a unique color and icon. Arranging the folders is as simple as dragging and dropping and adding spaces to separate the folders into groups. This app allows for an almost infinite range of customization, which is a double edged sword. You can adjust this app to work in exactly the way you need it to. On the other hand, you might also get caught up in tweaking the app so much that it cuts into your productivity.

Awesome Note syncs with either Evernote or Google Drive. The advantage of using Evernote is that it can read the text on any picture, making search a breeze. On the other hand, you have a data upload limit on the free plan. In other words, if you plan on syncing your Awesome Note on a regular basis, you should have a paid account with Evernote. On the other hand, Google Drive is free. Sync everything. Don’t pay a dime. There are two downsides that you should be aware of, though. First, Google doesn’t read the text on pictures the way Evernote does. The other issue is really a matter of preference. Google reads your stuff. All of it. It’s not that you have a funny looking bald man reading through everything. Computers analyze your emails and documents to find patterns that they can use to feed you personalized ads. I’m OK with that. I don’t pay attention to ads anyway. If privacy is a big issue for you, you’ll want to get an account with Evernote instead.

The other reason Drive is the clear choice for me is that you have a simple way to edit your notes online. To be clear, notes in Awesome Note can only become documents in Drive. Of course, it works the other way, too. Documents you make in Drive become notes. However, you won’t be able to sync Presentations, Spreadsheets, Drawings or anything else to Awesome Note.

There it is. Awesome Note in combination with Google Drive can create a fantastic system of productivity.

3/14/2013

OnlineEducation's great graphic: Digital research

Please include attribution to OnlineEducation.net with this graphic, if you choose to use it.  Digital Research Infographic